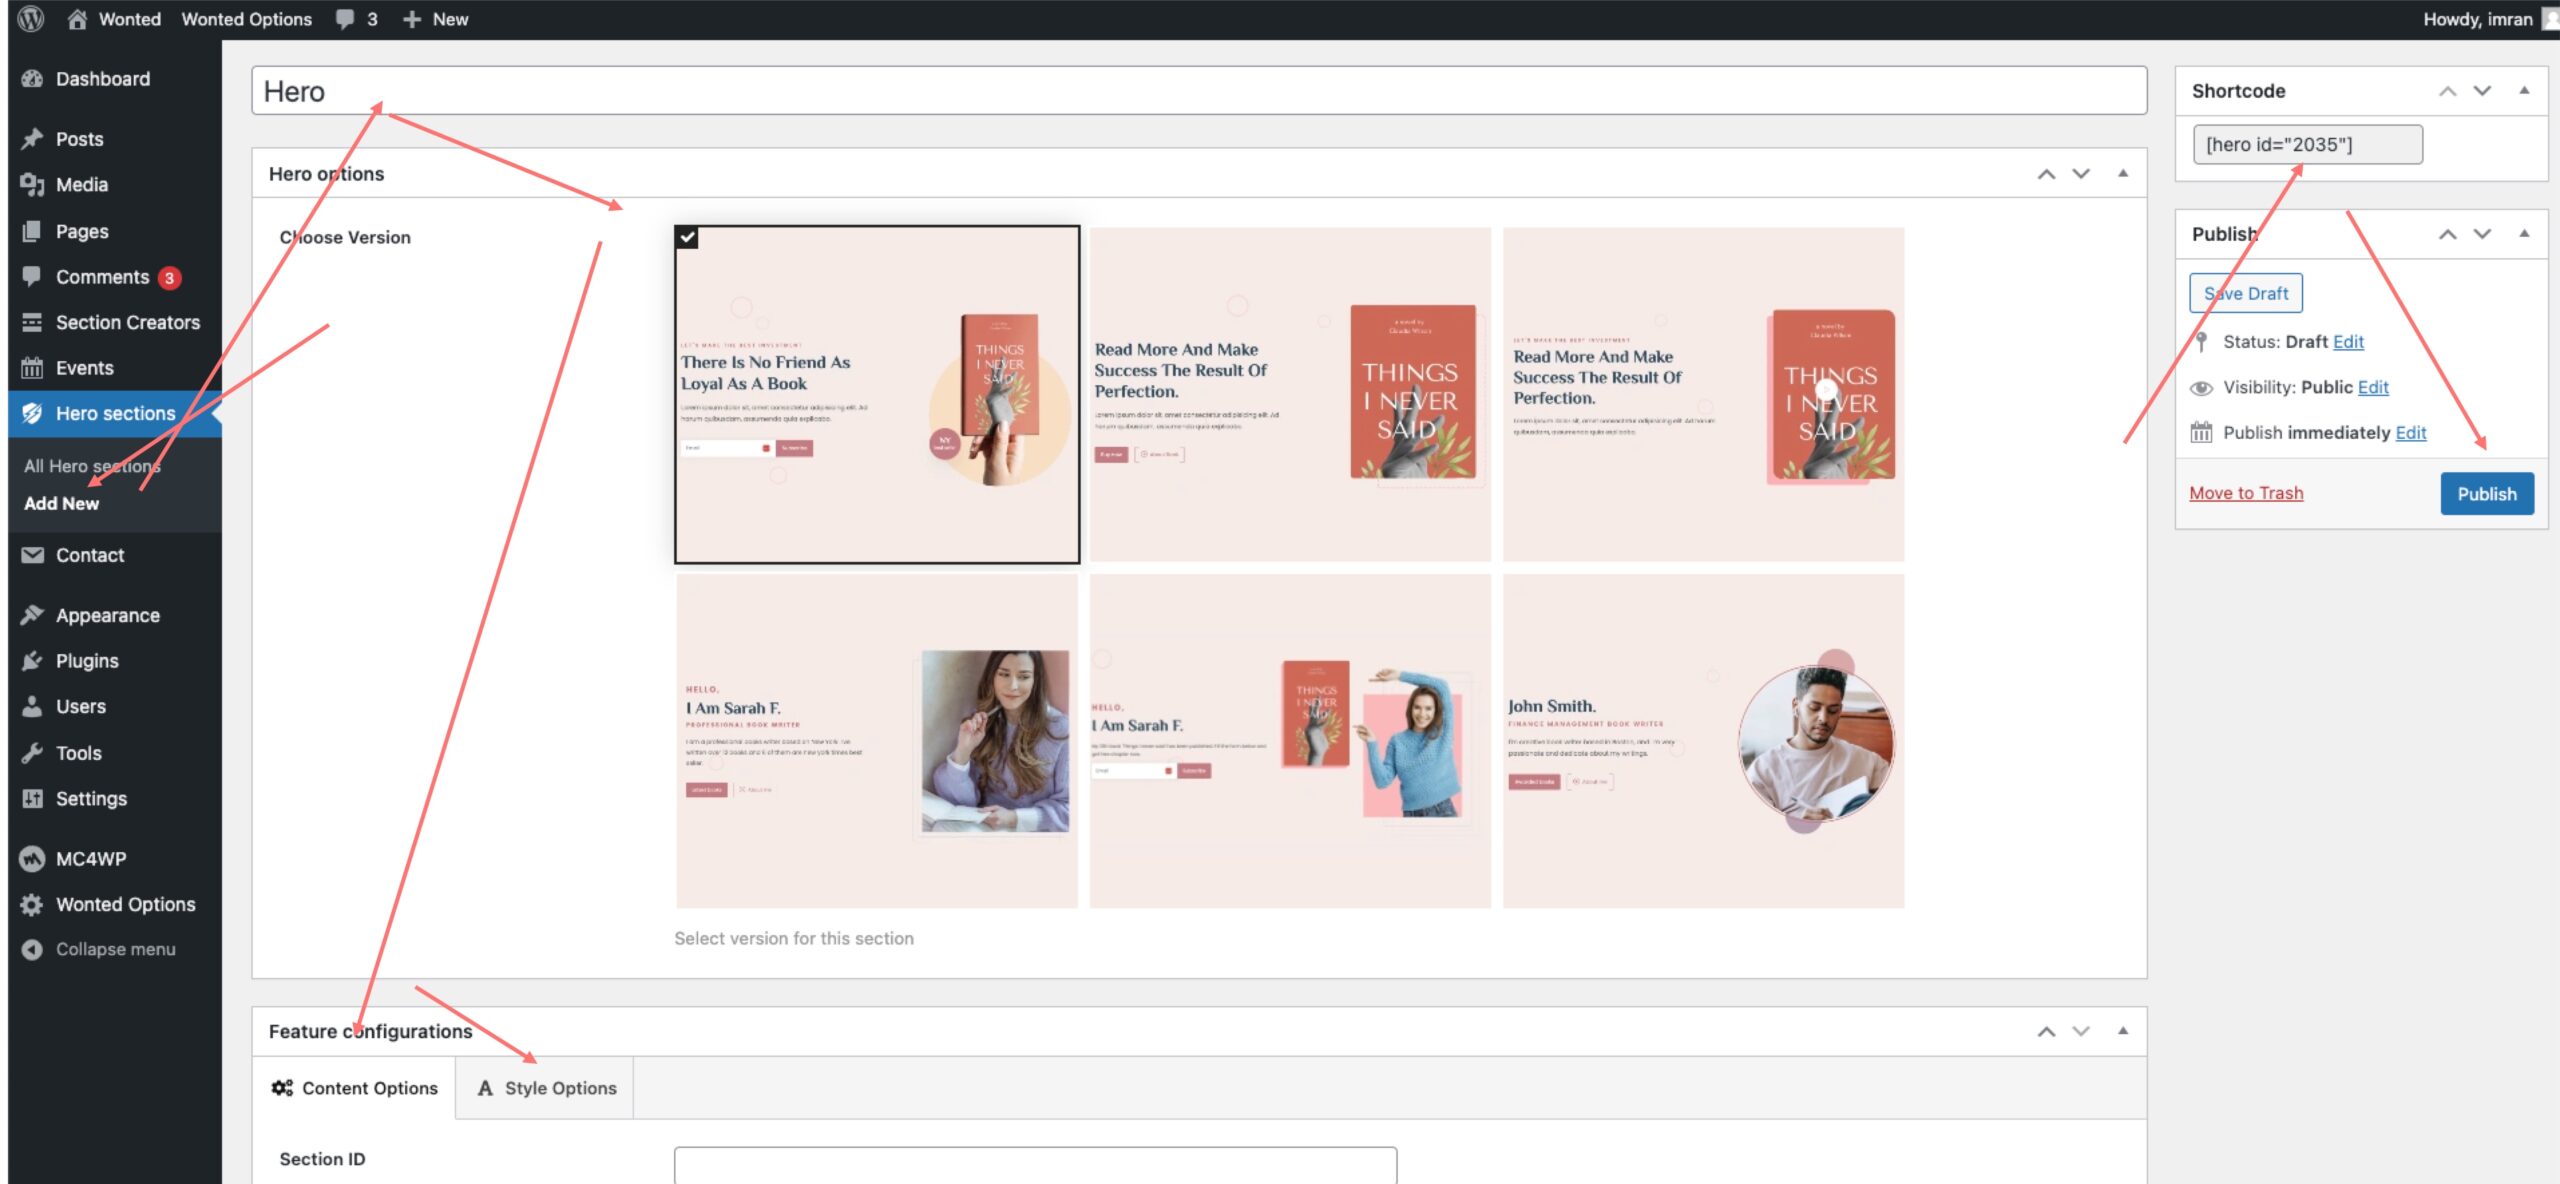
To create a Hero section, follow these simple steps:
- Go to the “Hero sections” and click on “Add New.”
- In this section, you’ll find various options for creating your hero. Start by adding a title for your hero section. You can also choose a version and assign a unique ID if you want to use it in your website’s menu.
- Once you’ve set the basic details, you can customize your hero section further based on the demo you’ve selected. There are two tabs available for configuring settings: “Content options” and “Style options.”
- After you’ve configured your hero section to your liking, click the “Publish” button.
- Once published, you’ll see a shortcode at the top of the side panel in the editor labeled as “Shortcode.”
- You can copy this shortcode and paste it anywhere on your page where you want to display the hero section. If you haven’t selected a hero from the bottom of the page editor, you can still use this shortcode to insert the hero section into your content.
