General Settings (Multi-Agent List/Grid)
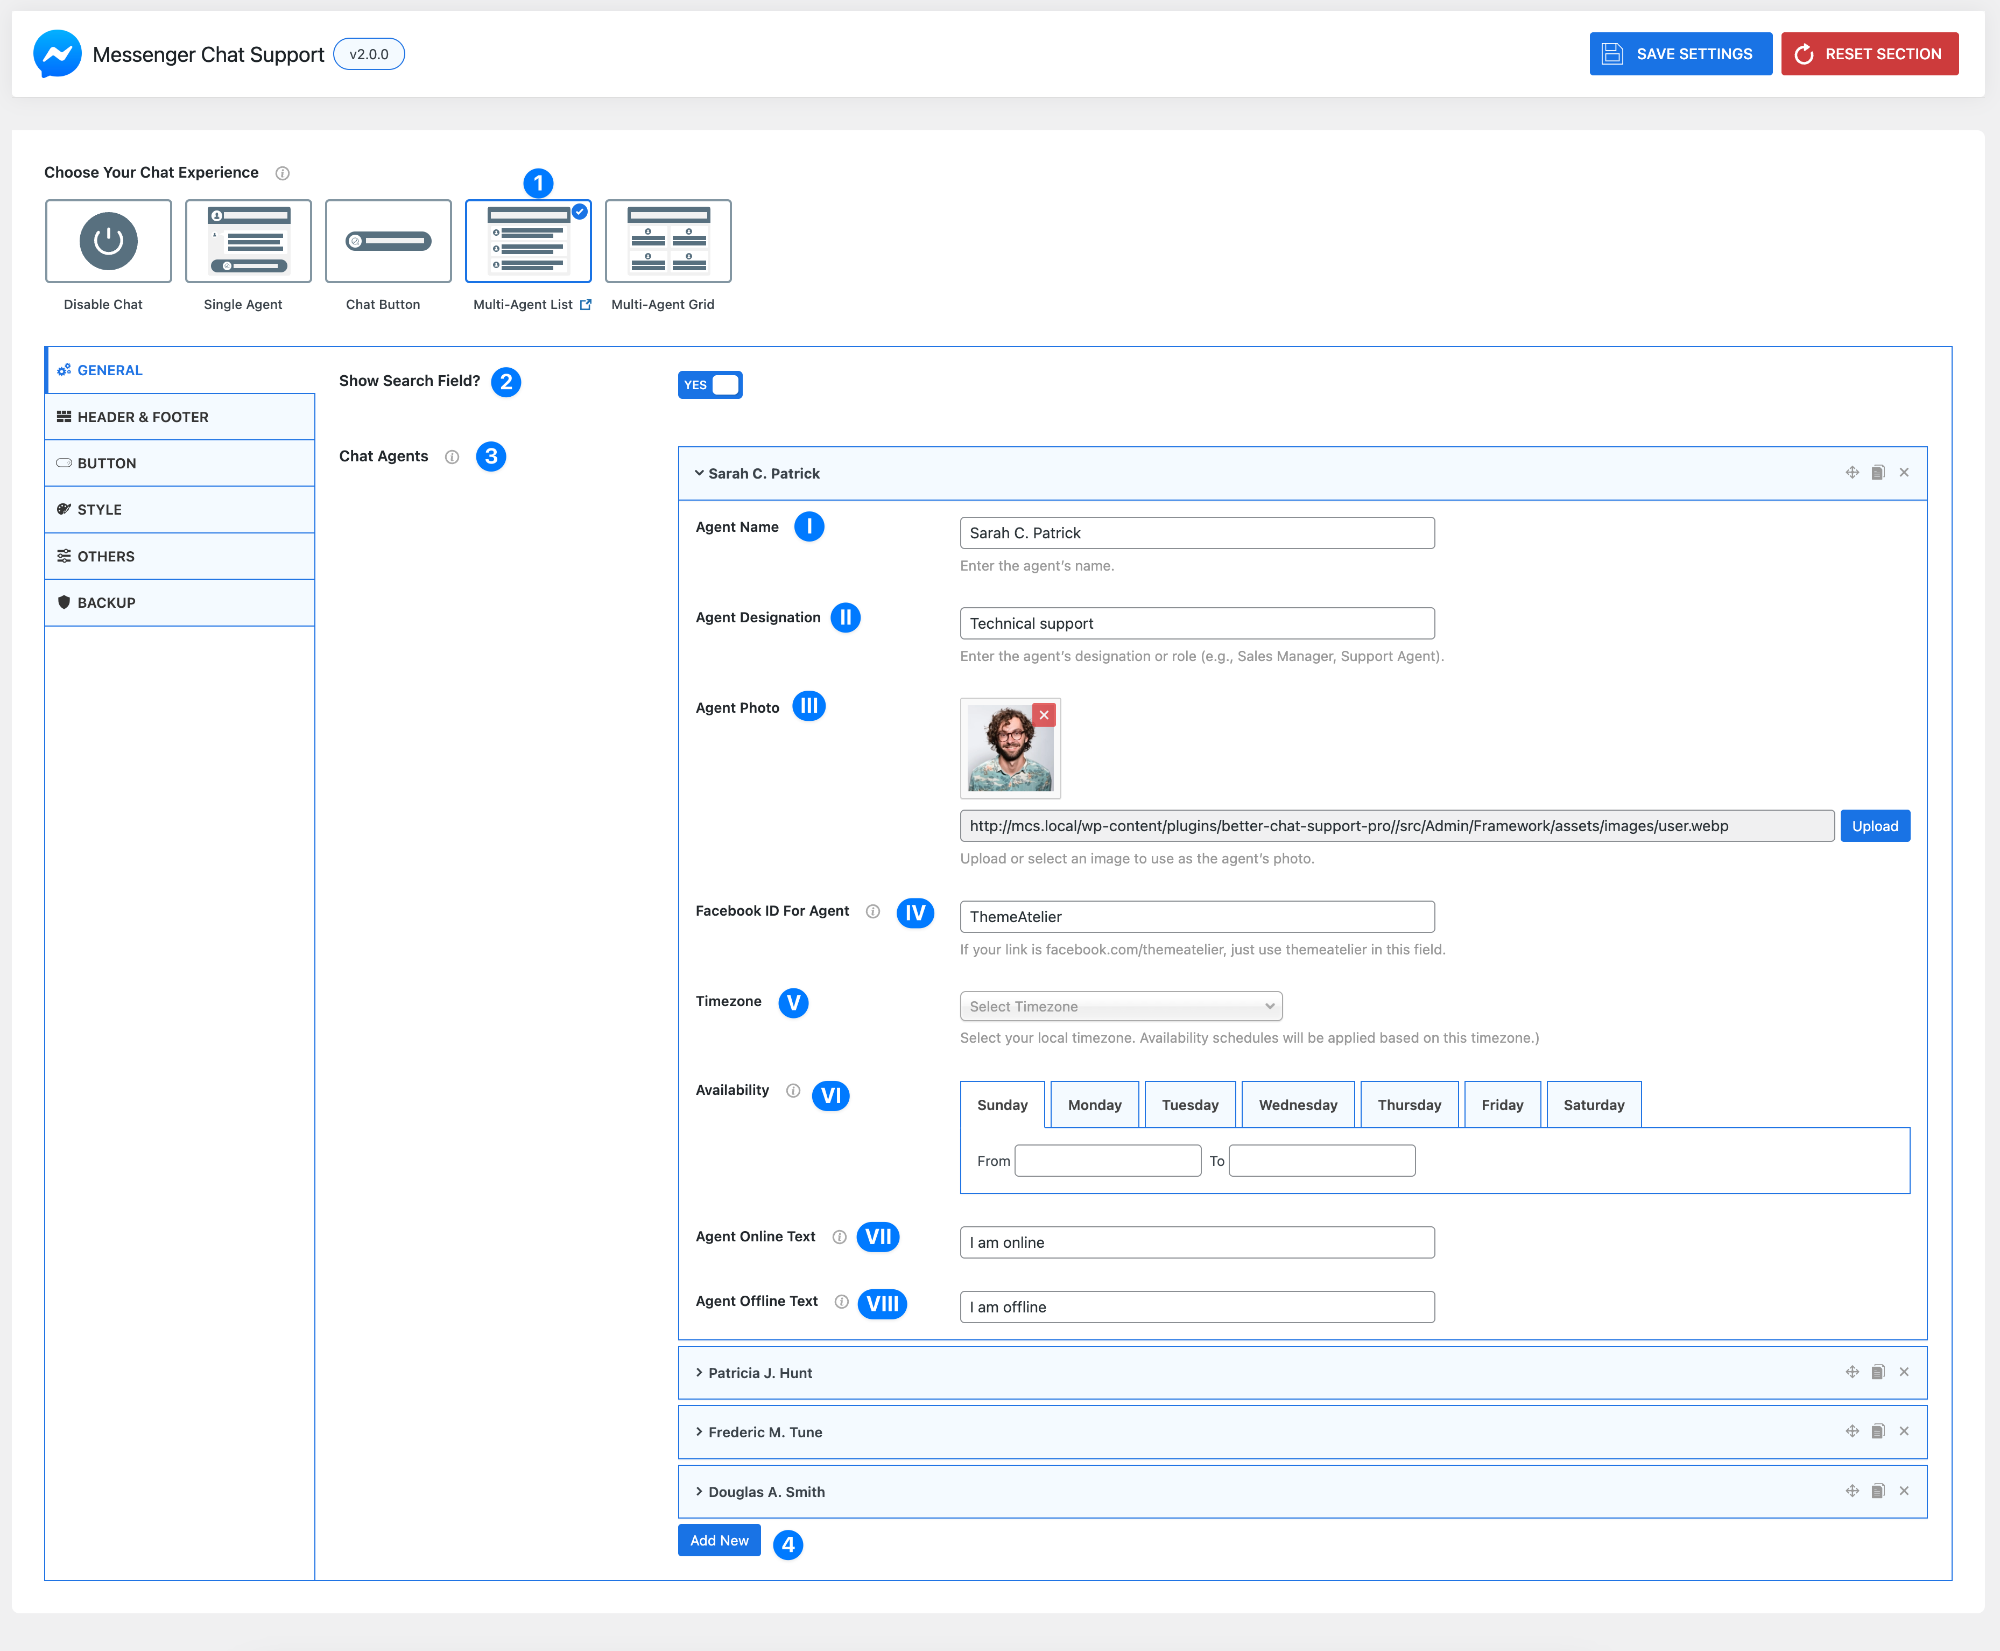
- Choose Your Chat Experience (Multi-Agent List/Grid) – When you select Multi-Agent List/Grid (1), users can choose from multiple agents to start a conversation. This is ideal for teams handling different roles like support, sales, or billing.
- Show Search Field – Enable this option to allow users to quickly search and find agents.
- Yes – Displays a search bar
- Helpful when you have multiple agents
- Chat Agents – Add and manage your support agents.
Each agent includes the following settings:
I. Agent Name – Enter the agent’s name.
Example: Sarah C. Patrick
II. Agent Designation – Add the agent’s role or title.
Example: Technical Support / Sales Manager
This helps users choose the right person.
III. Agent Photo – Upload the agent’s profile image.
- Use a clear, professional image
- Helps build trust and recognition
IV. Facebook ID for Agent – Enter the agent’s Messenger username or page ID.
- Example:
facebook.com/themeatelier→ enter themeatelier - Do not paste the full URL
V. Timezone – Select the agent’s local timezone.
This ensures availability is shown correctly for each agent.
VI. Availability – Set working hours for the agent.
- Select a day (Sunday–Saturday)
- Define From and To times
- Repeat as needed
VII. Agent Online Text – Message shown when the agent is available.
Example: I am online
VIII. Agent Offline Text – Message shown when the agent is unavailable.
Example: I am offline
- Add New Agent – Click Add New (4) to add more agents to your list.
You can create multiple agents depending on your team size.
Pro Tip
Use clear roles, real photos, and accurate availability for each agent to help users quickly choose the right person and improve response efficiency.
Header & Footer Settings (Multi-Agent List/Grid)
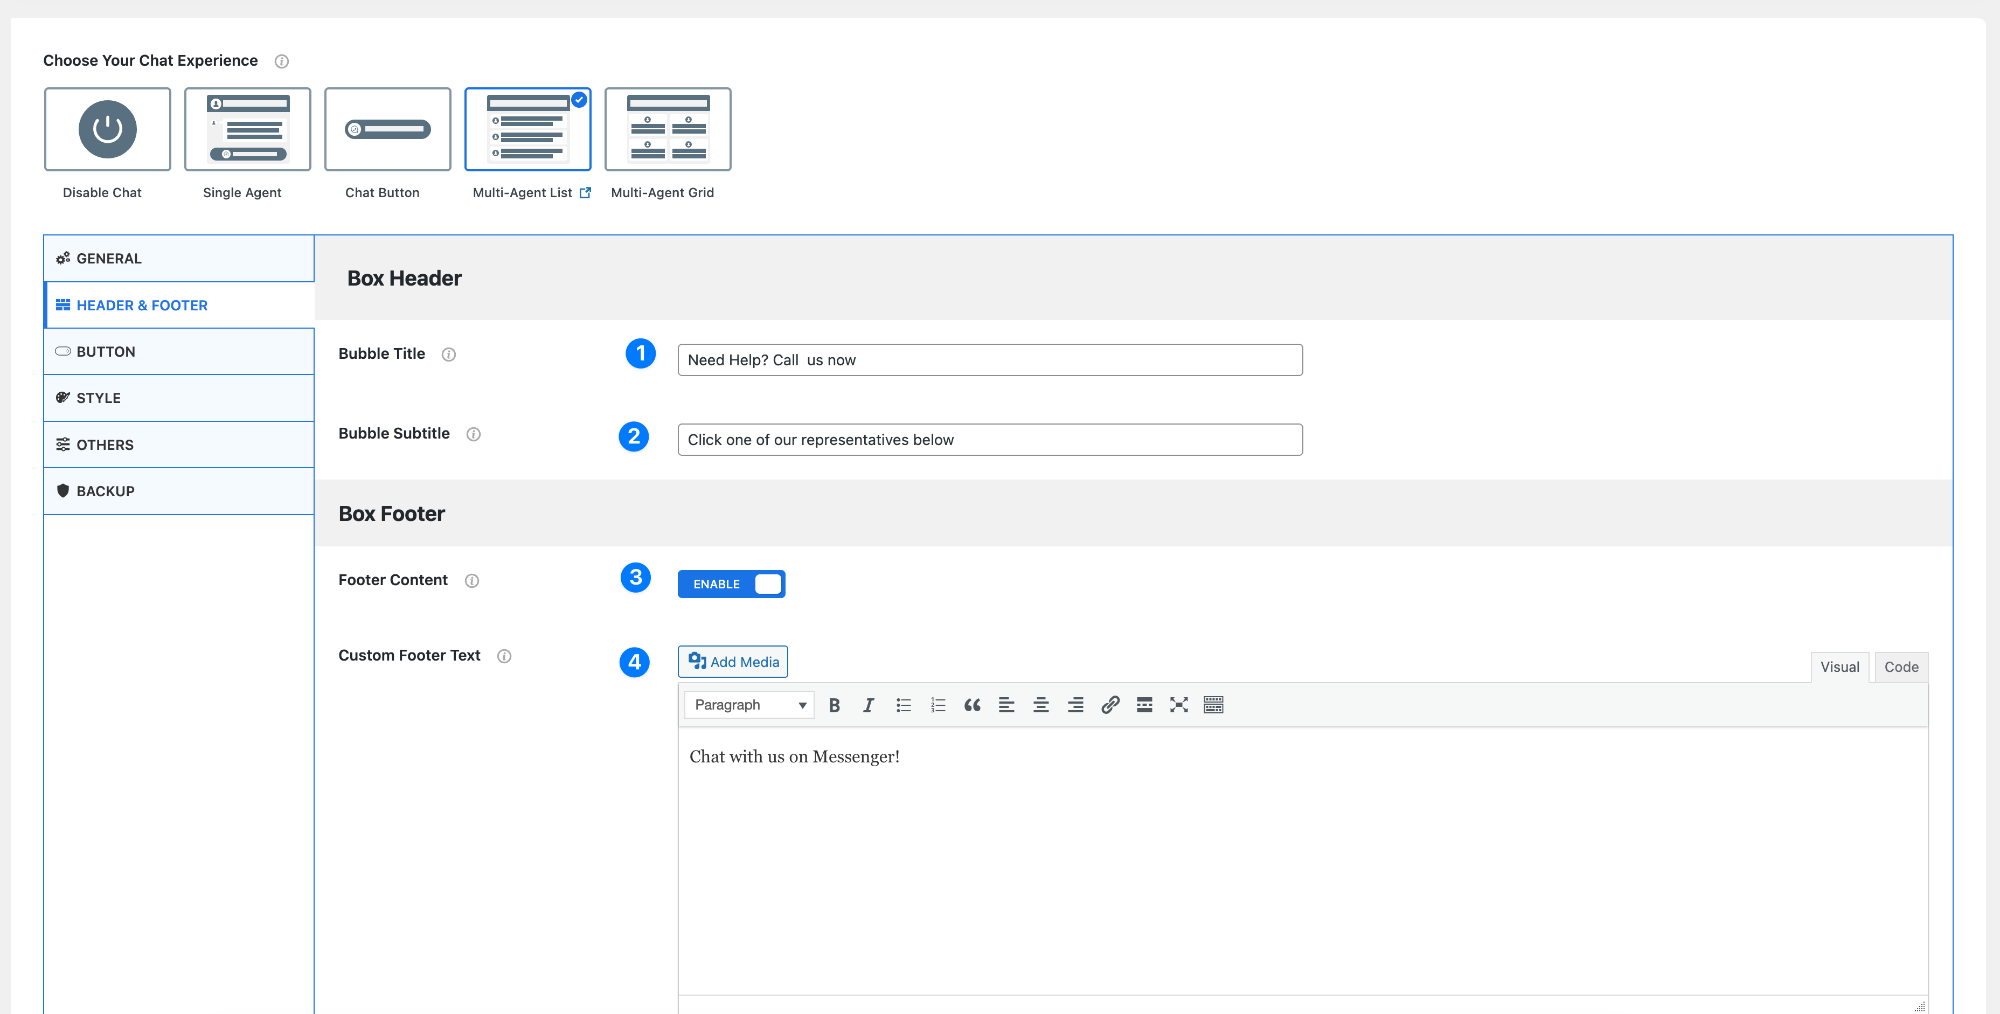
Box Header
- Bubble Title – This is the main heading shown at the top of the chat box.
Example: Need Help? Call us nowUse this to grab attention and clearly communicate support availability.
- Bubble Subtitle – A short description shown below the title.
Example: Click one of our representatives belowThis helps guide users on what to do next.
Box Footer
- Footer Content – Enable or disable the footer section.
- Enabled – Shows additional footer content
- Disabled – Hides the footer area
- Custom Footer Text – Add custom content at the bottom of the chat box.
Example: Chat with us on Messenger!You can use this for:- Call-to-action text
- Instructions
- Branding message
Pro Tip
Use a strong Bubble Title + Subtitle combination to guide users quickly, and a clear footer message to reinforce action (e.g., “Start chatting now”).