After purchasing the plugin, you’ll receive a quick guide covering everything from installation to setting up the Better Chat Support for Messenger on your website. This article provides step-by-step instructions to help you start using the plugin in no time.
Installation
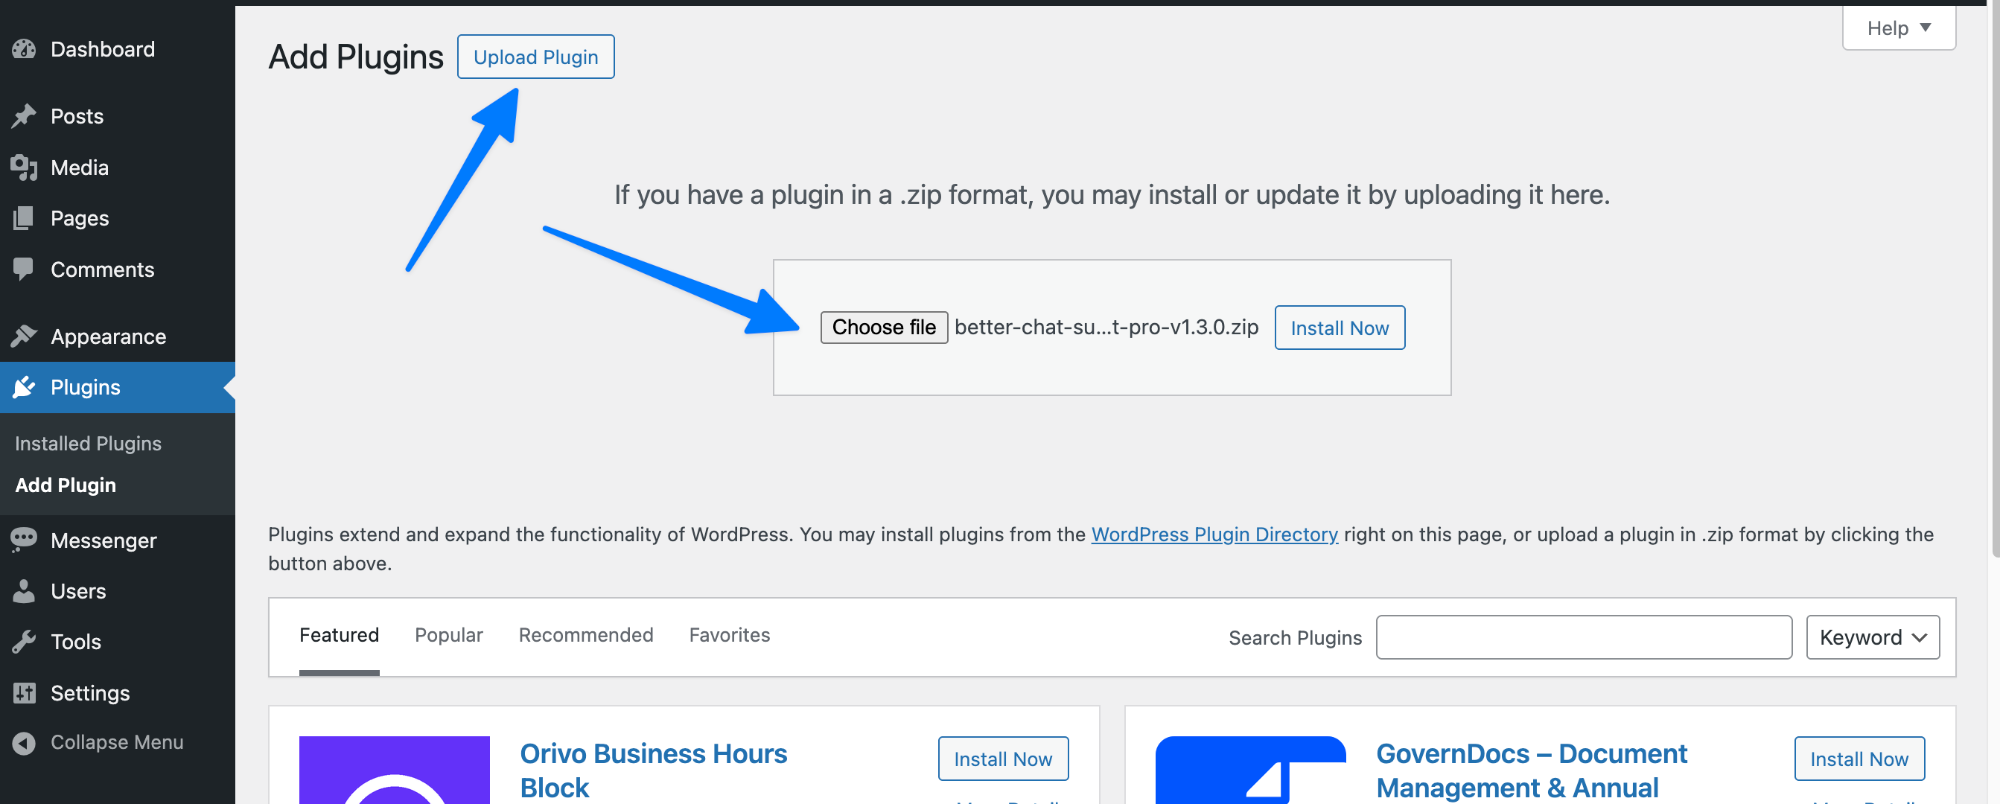
After downloading the plugin, you’ll find the files in a zip folder named better-chat-support-pro.zip on your computer. Follow the steps below to install the Better Chat Support for Messenger Pro version.
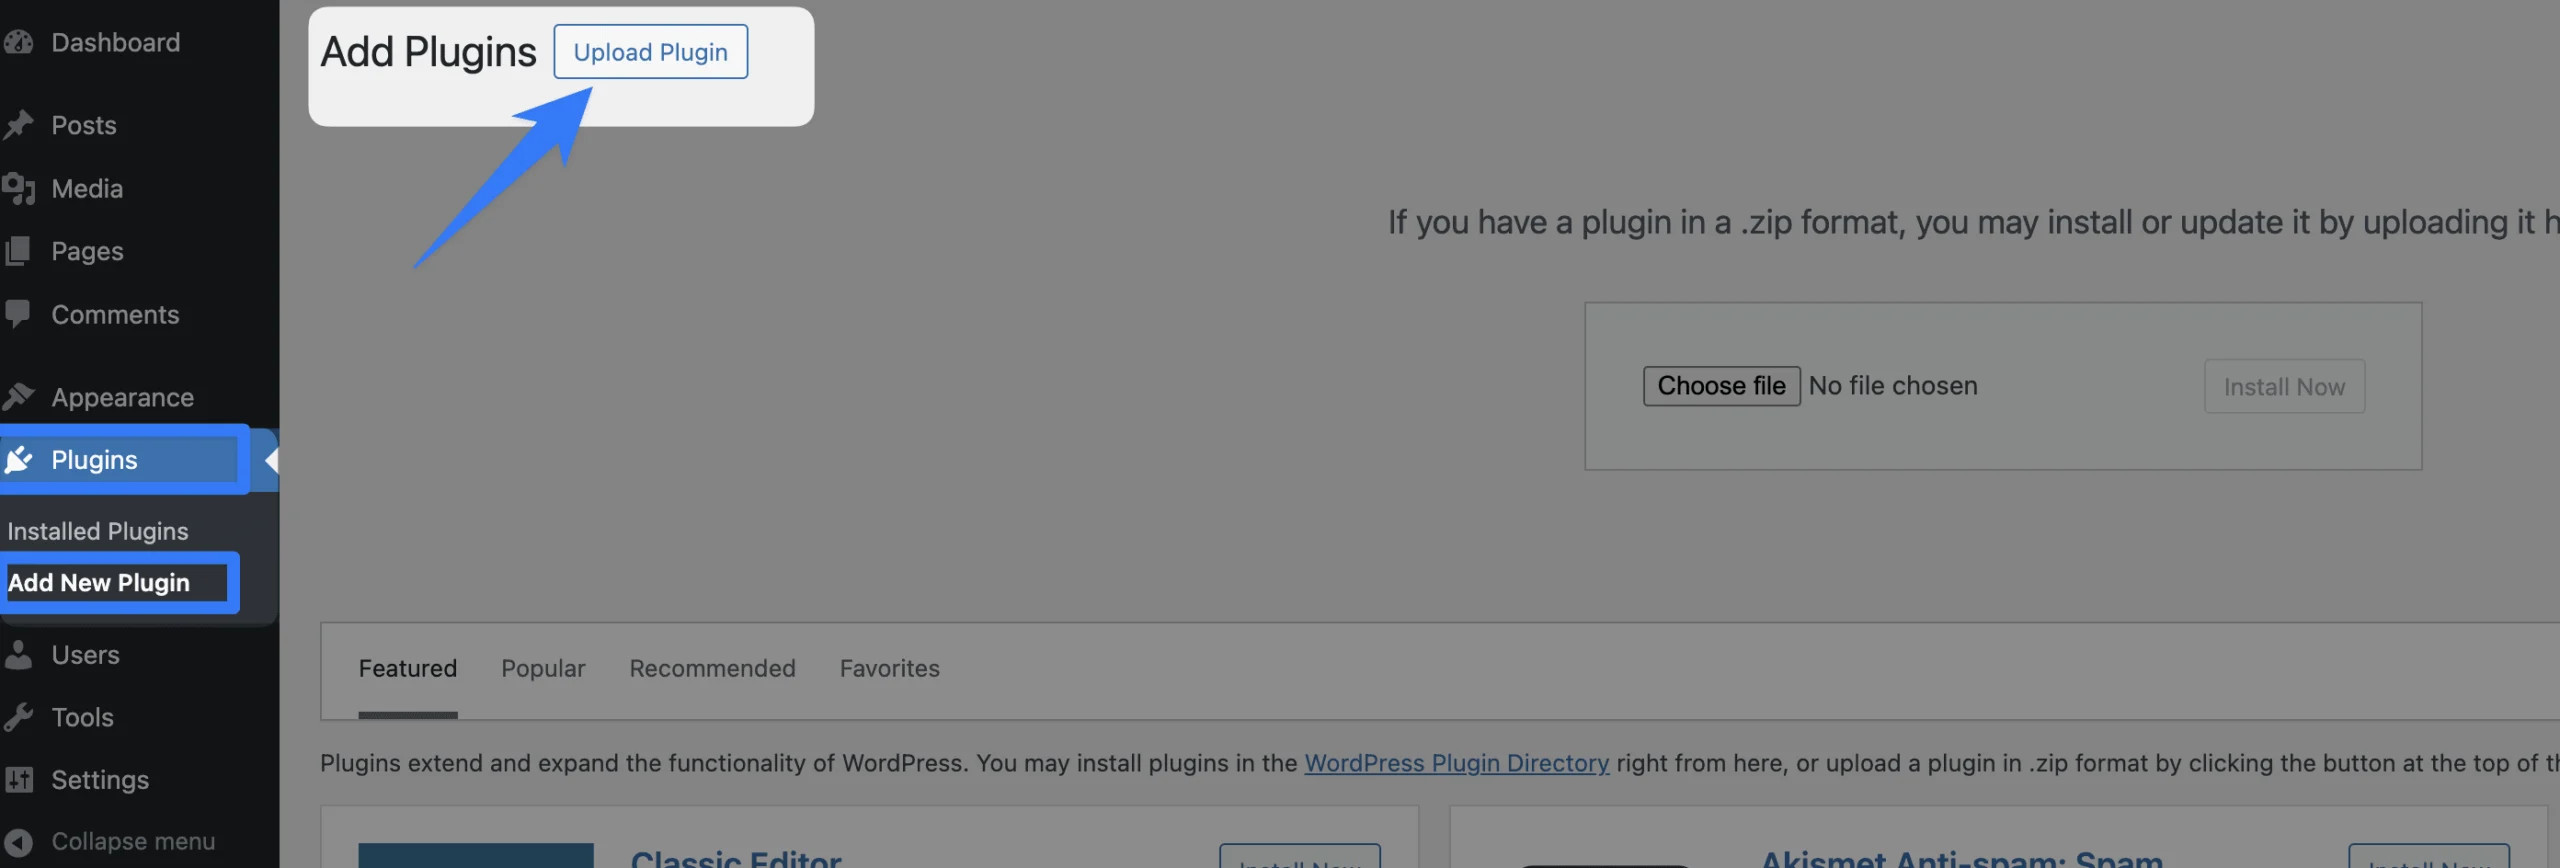
1. Go to your WordPress website Dashboard.
2. Navigate to Plugins → Add New → Upload Plugin.
3. Once you click the “Upload Plugin” button, you will get the plugin upload option from your computer. Select the “better-chat-support-pro.zip” file from your computer and click the “Install Now” button.
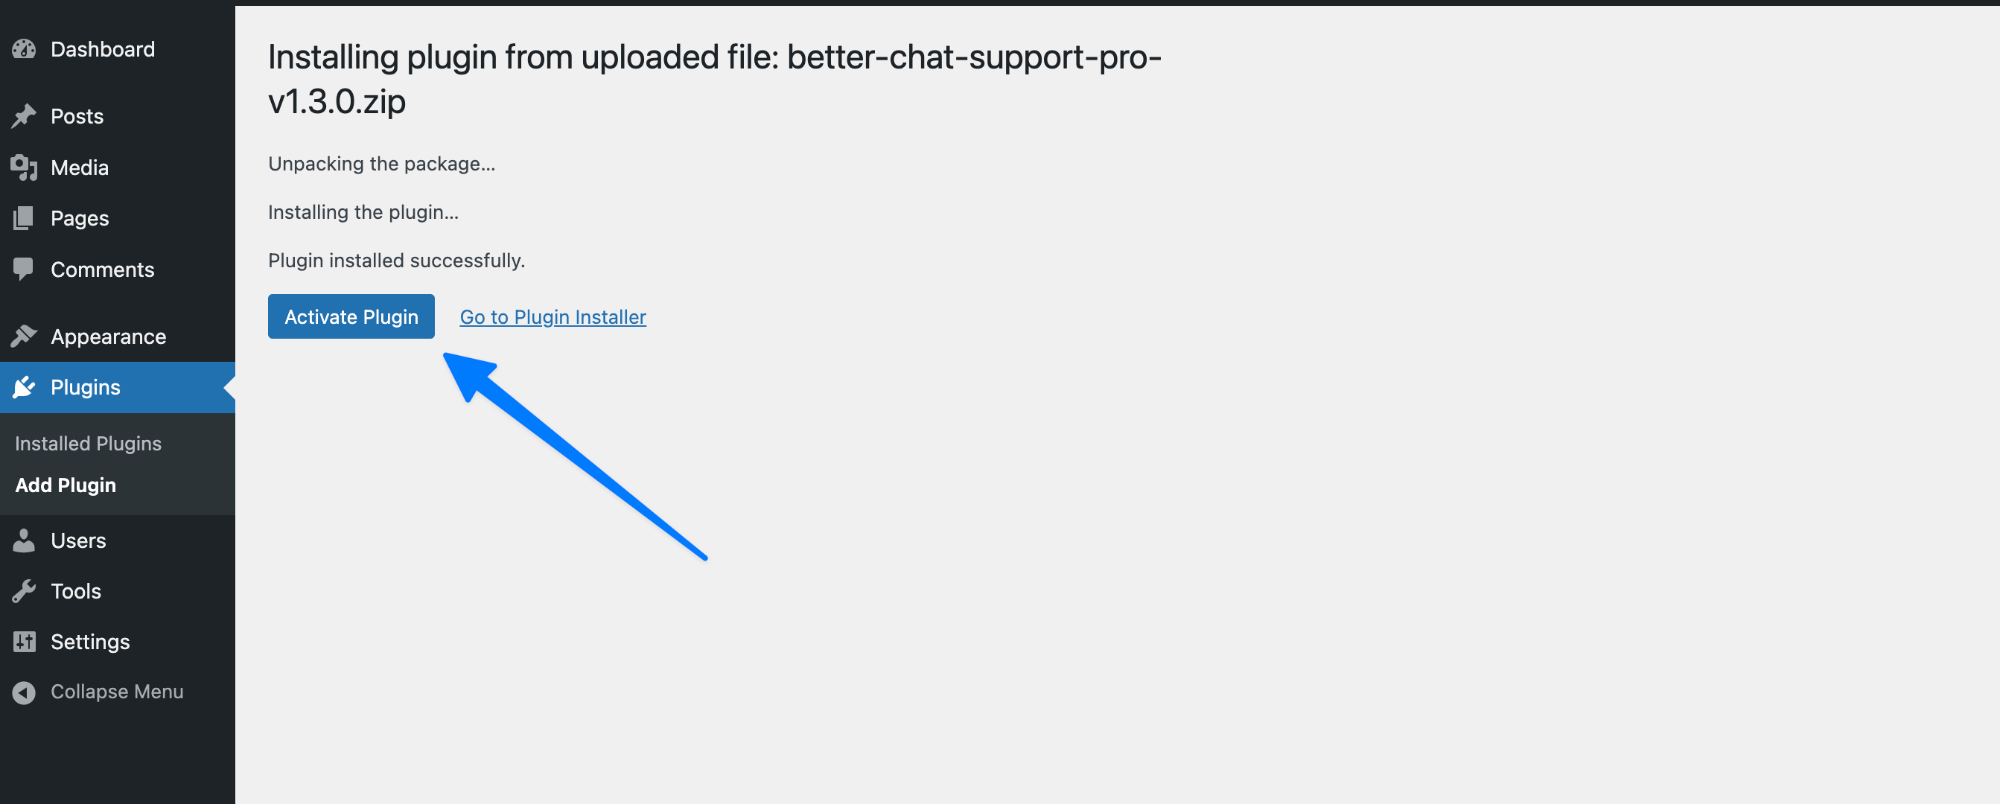
4. After successfully installing the plugin, click “Activate Plugin “ to activate the plugin.
License Key Activation
After activating the plugin, you will be redirected to the License Activation page. Get the License key from your Themeatelier account and insert it into the License Activation Field.
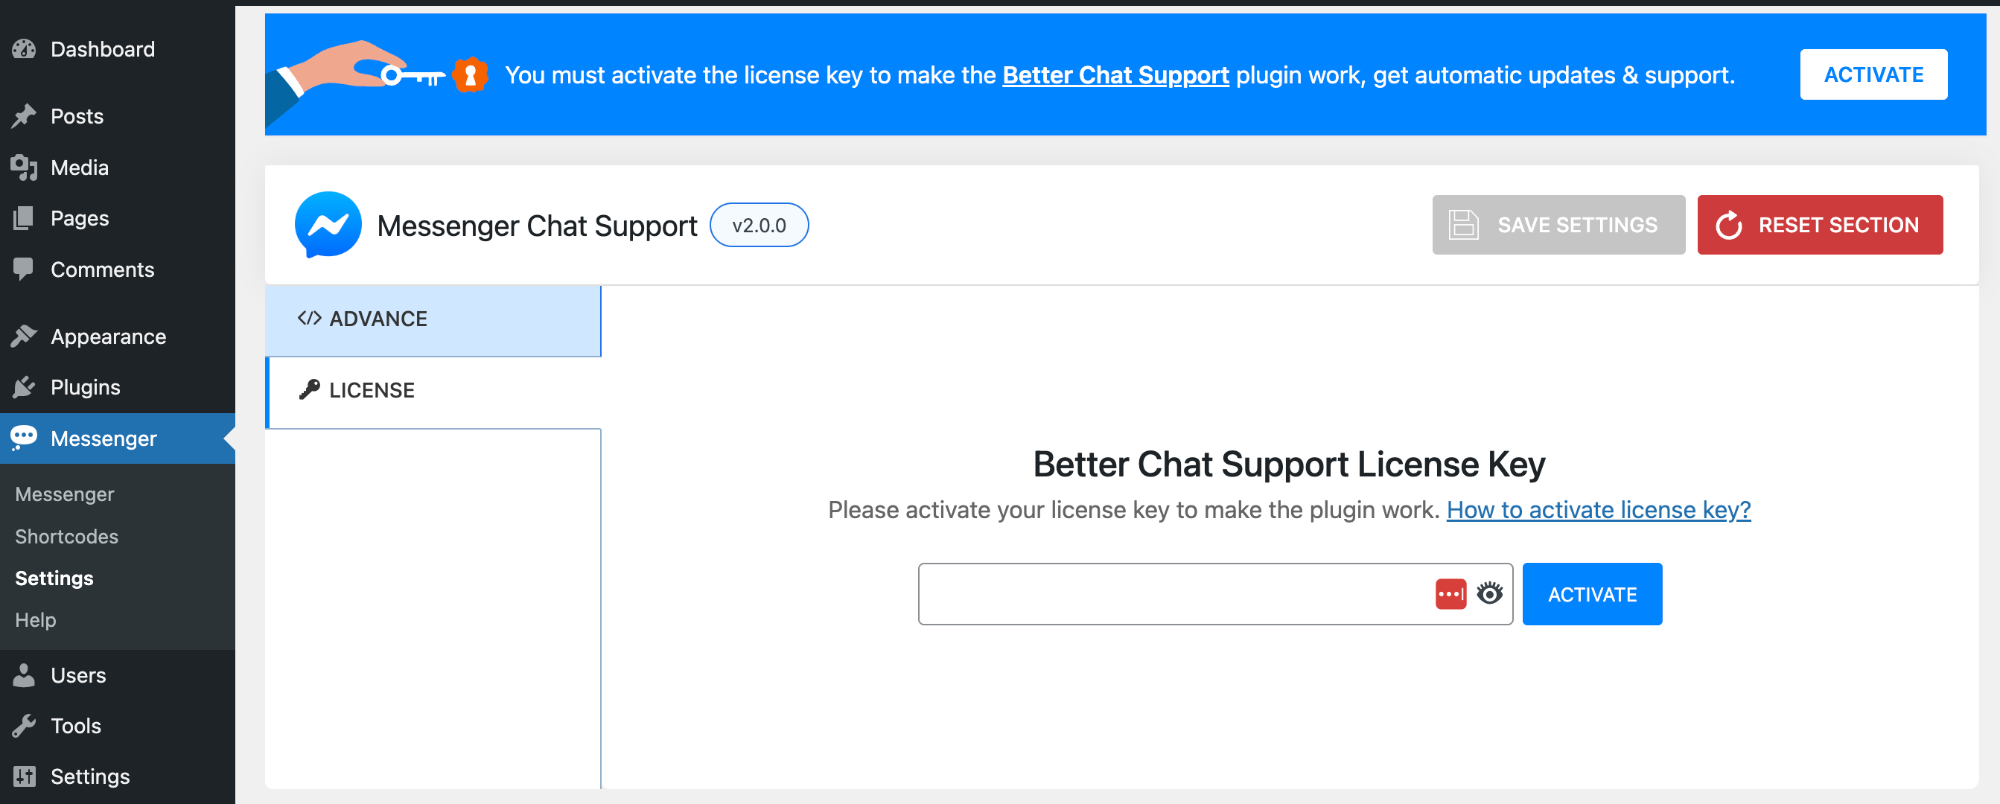
After activating the License Key, you are ready to use the Better Chat Support for Messenger plugin’s features.
Configuring Better Chat Support for Messenger
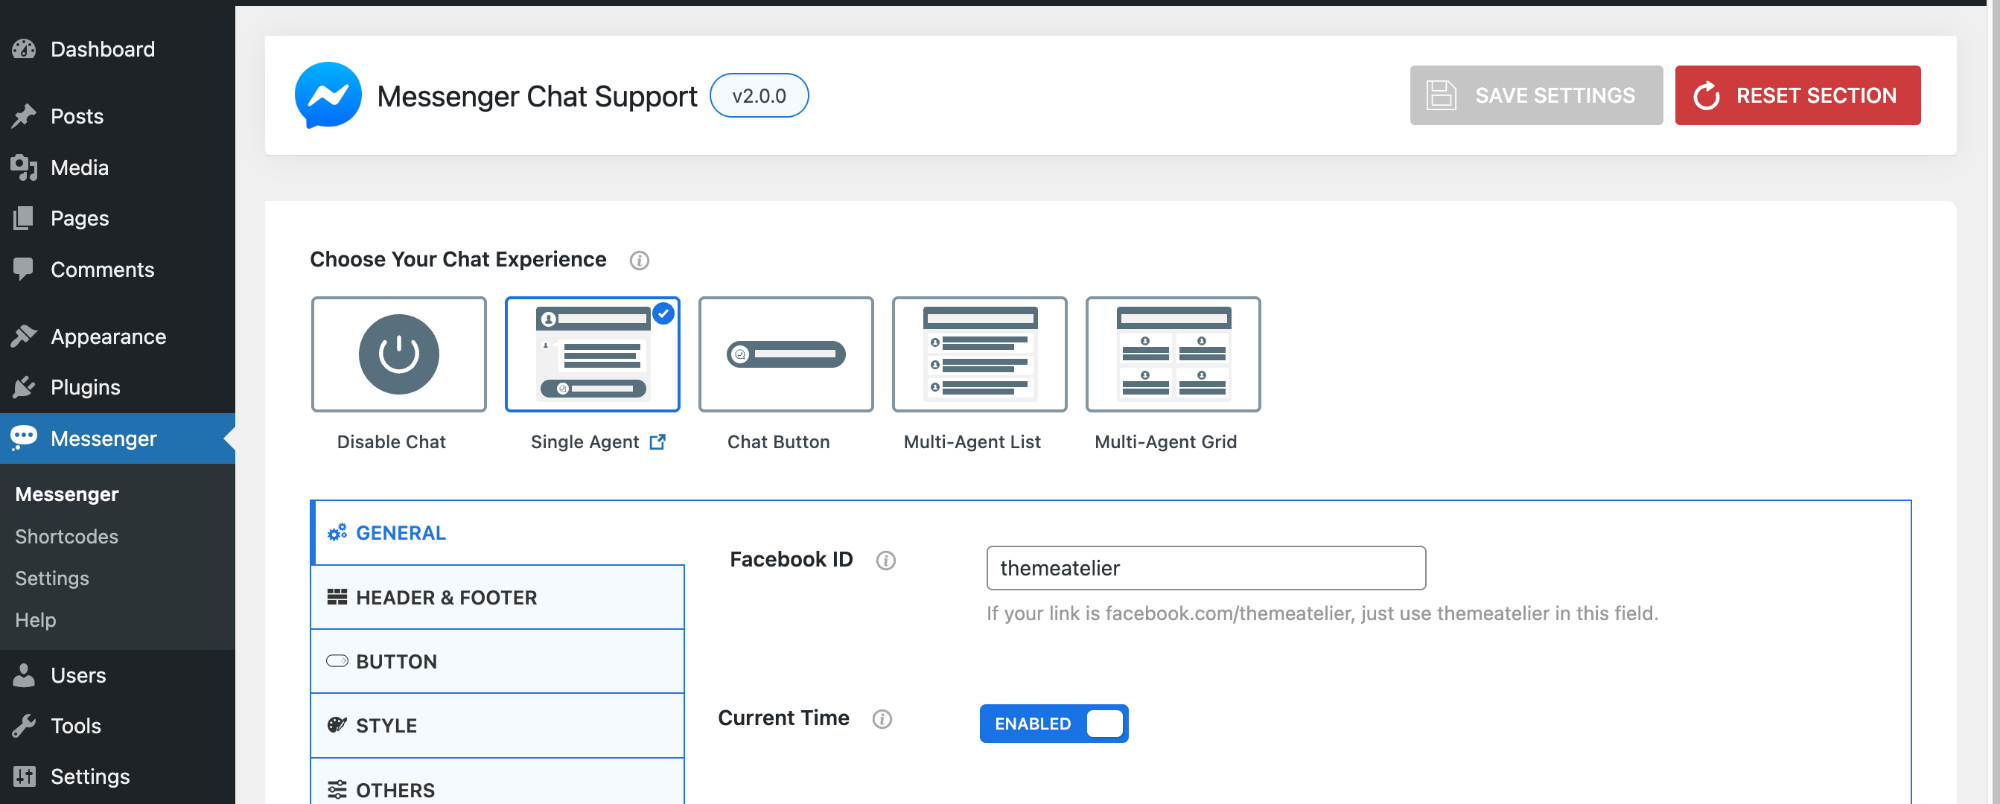
Go to the Messenger menu on your dashboard to configure the Messenger settings as you wish across the different settings tabs for your entire page.