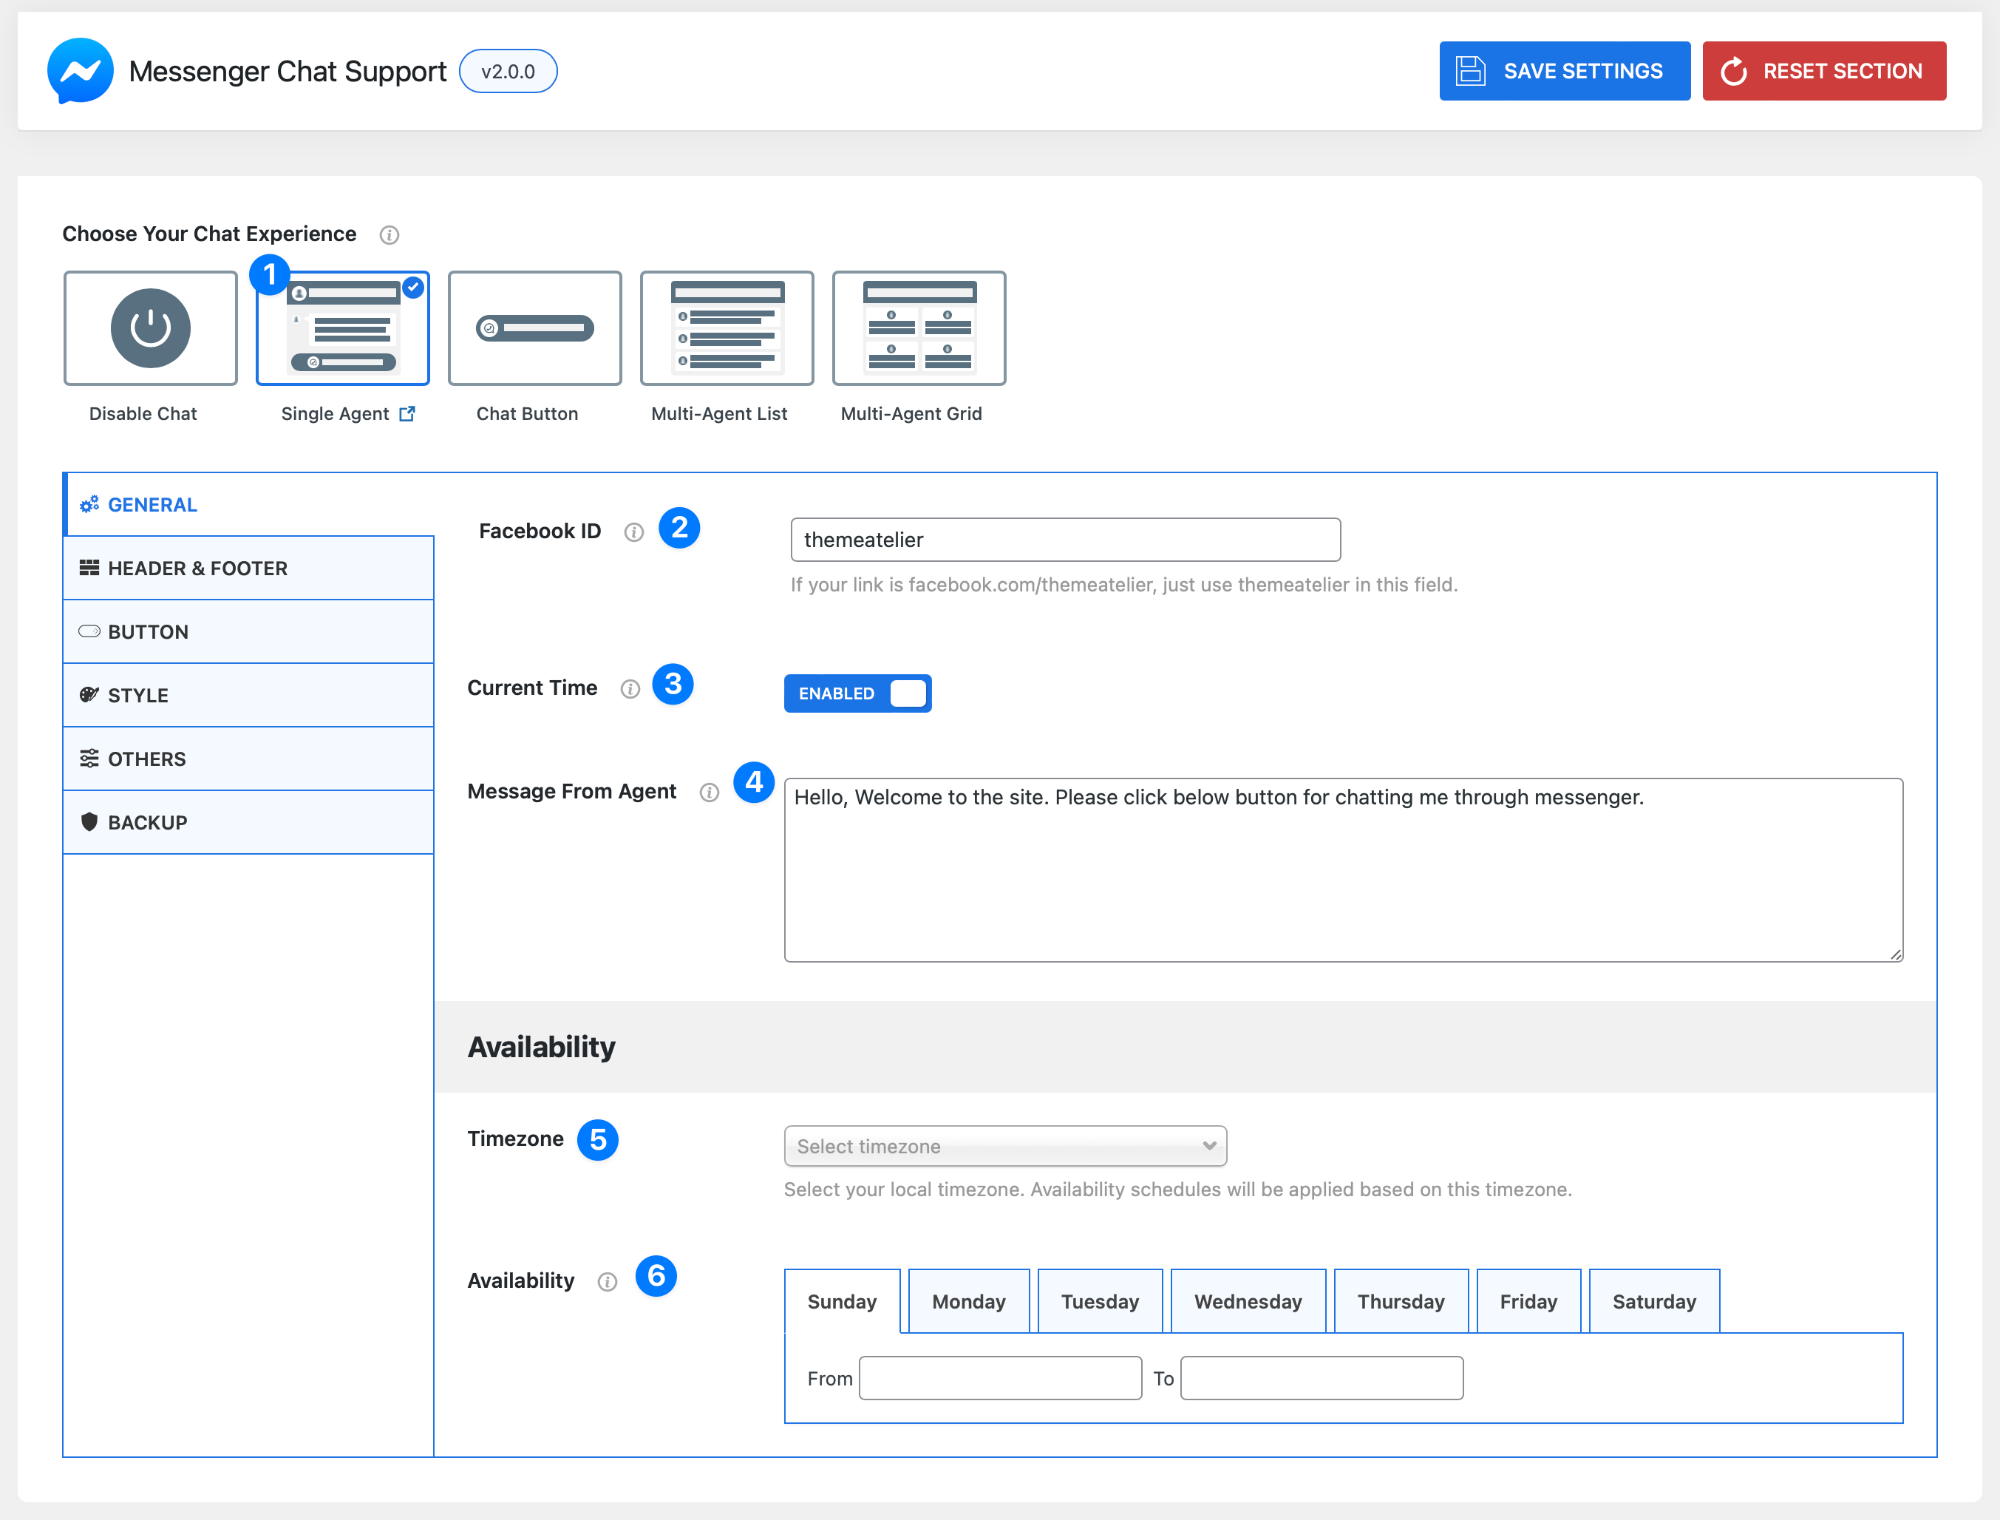
General Settings (Single Agent)
- Choose Your Chat Experience (Single Agent) – When you select Single Agent (1), you can configure how your Messenger chat works for a one-to-one support experience. This setup is ideal for connecting visitors directly with a single person or business account.
- Facebook ID – Enter the Facebook username or page ID you want users to chat with.
- Example: If your page URL is
facebook.com/themeatelier→ enter themeatelier - Do not paste the full URL (This ensures all messages go directly to your Messenger account.)
- Example: If your page URL is
- Current Time – Enable this option to display your current local time inside the chat widget. This helps visitors understand your availability and adds transparency to your support experience.
- Message From Agent – This is the default greeting message users will see when the chat loads. Use this to welcome visitors and encourage them to start a conversation. Example: Hello! 👋 Welcome to our site. Click below to chat with us on Messenger.
Availability Settings
Control when you are available to respond to messages.
- Timezone – Select your local timezone. All availability schedules will follow this setting, so make sure it reflects your actual location.
- Availability Schedule – Set your working hours for each day of the week.
- Select a day (Sunday–Saturday)
- Define From and To times
- Repeat for other days as needed
This helps visitors know when they can expect a response.
Pro Tip
Even if users can message you anytime, showing accurate availability builds trust and improves response expectations.
Got it — here it is in your exact list format style 👇
Header & Footer Settings (Single Agent)
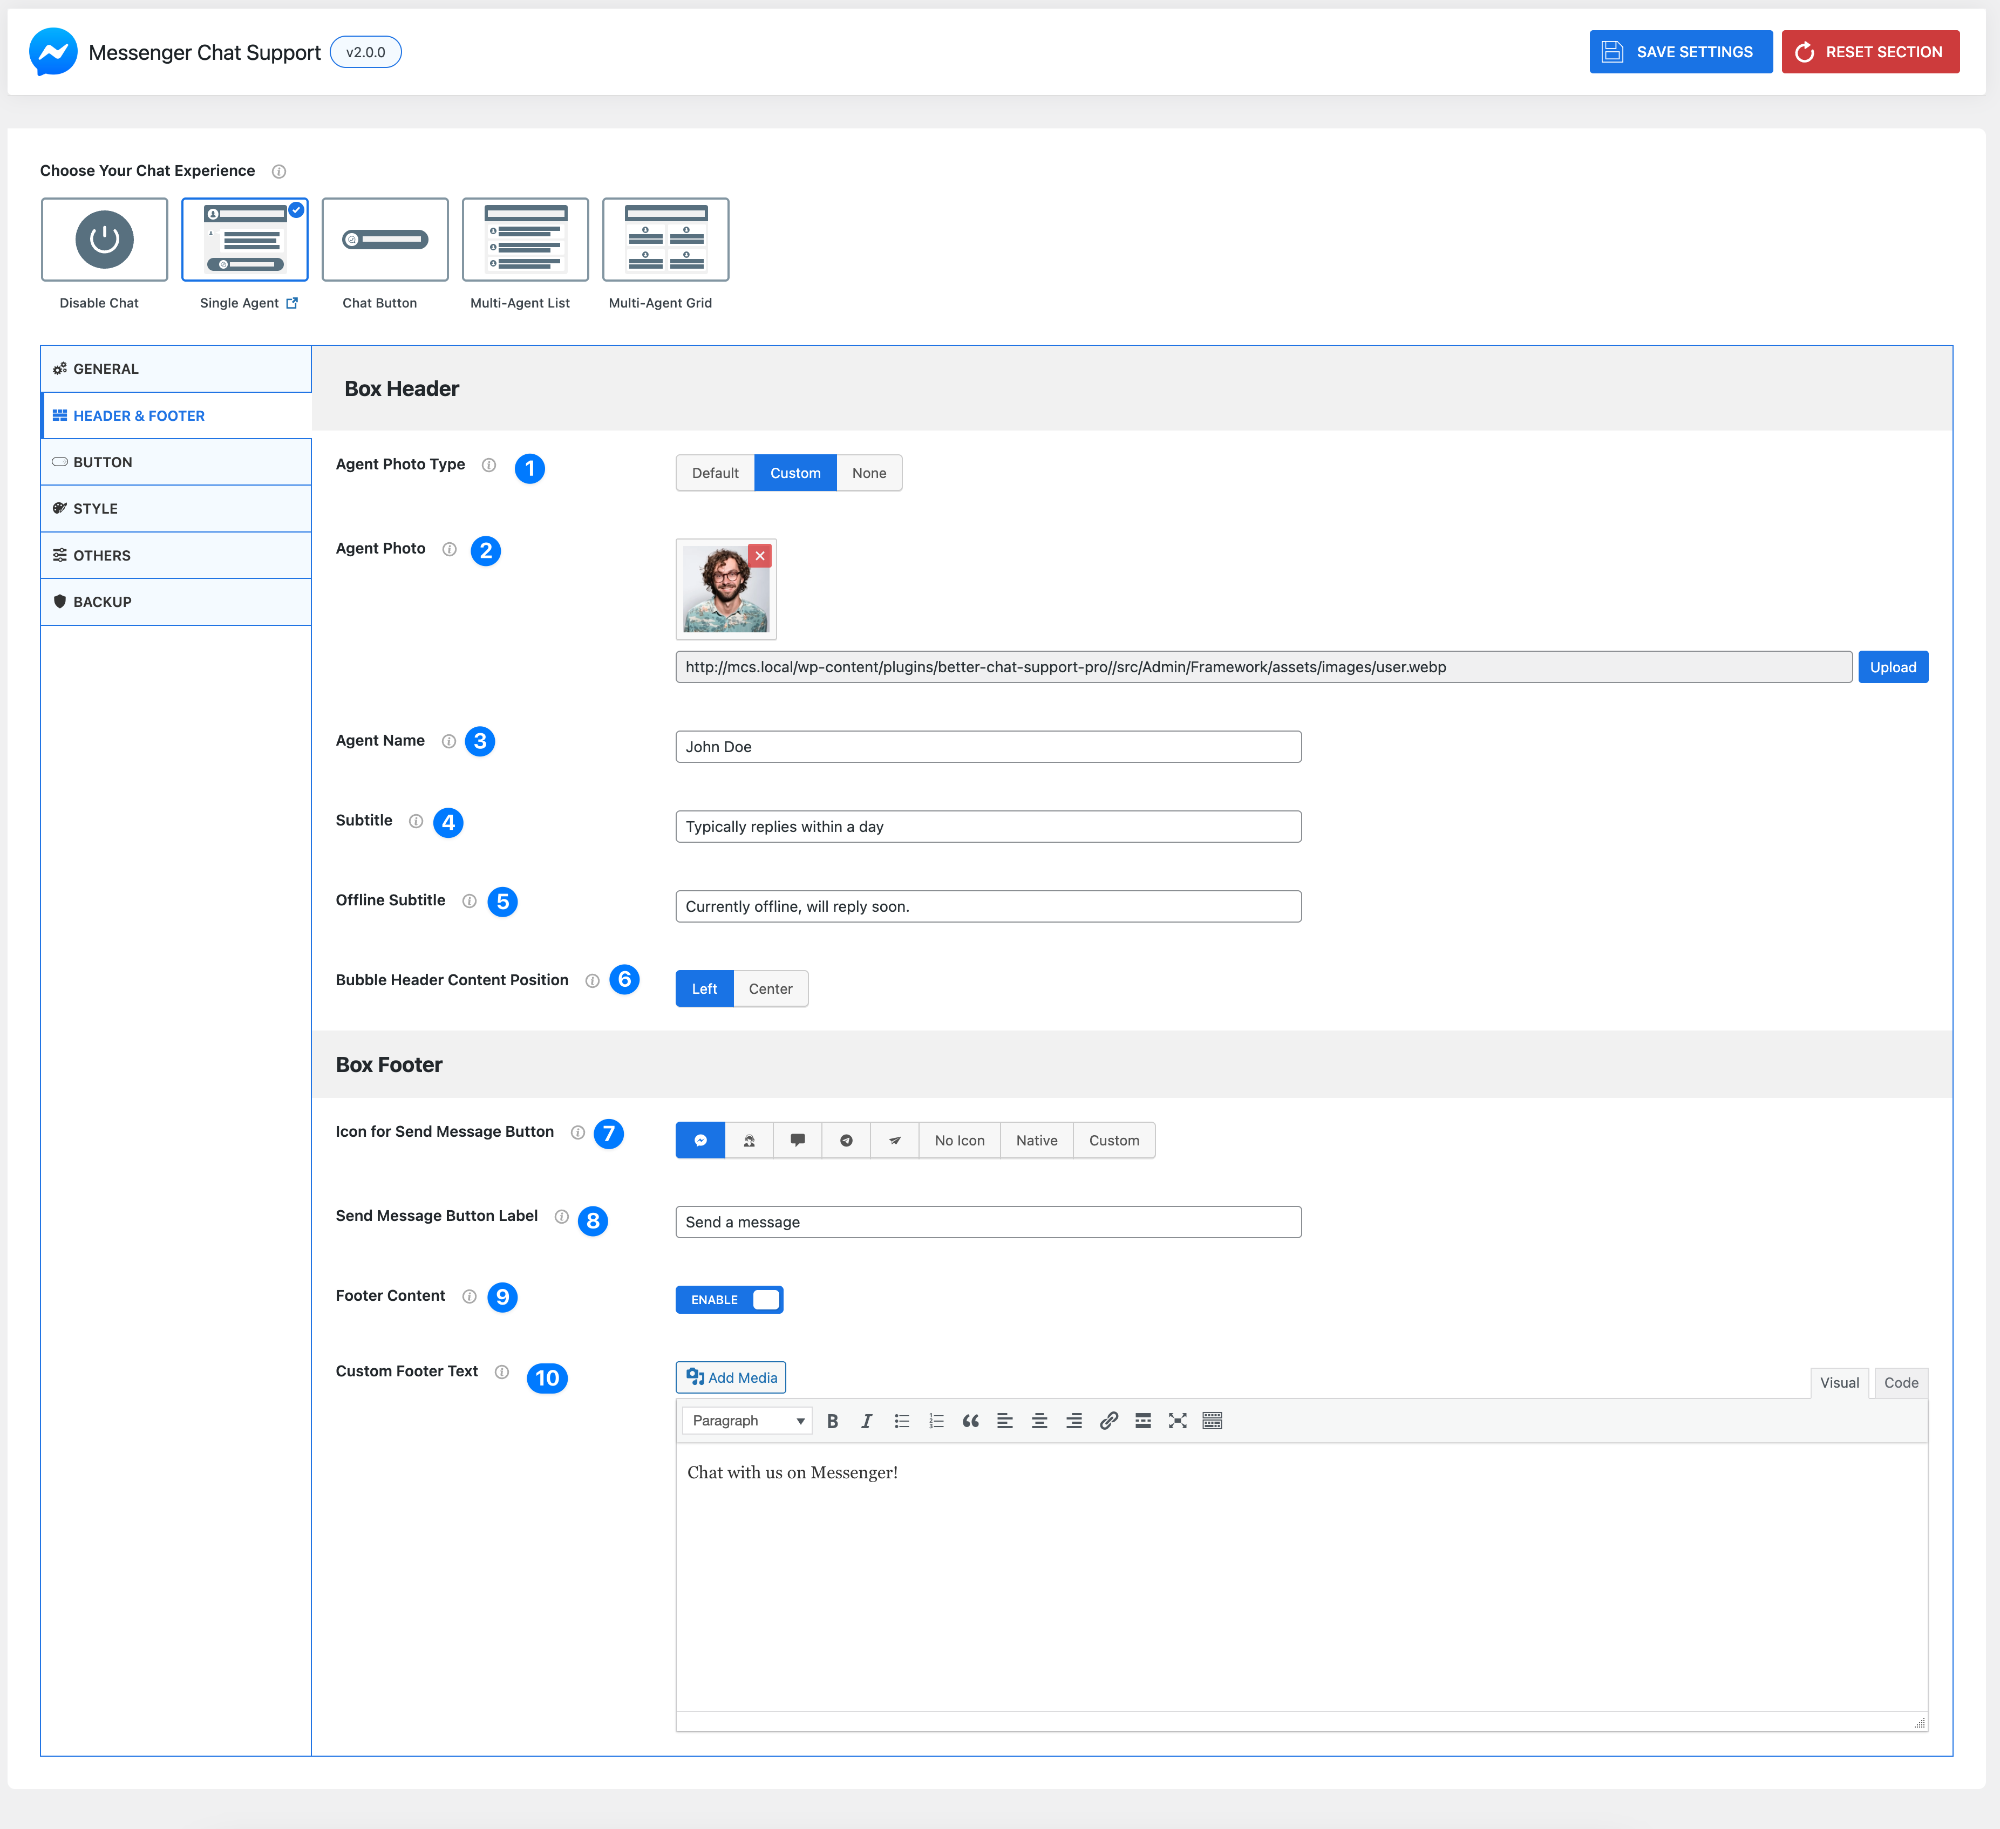
- Agent Photo Type – Choose how the agent profile image will be displayed.
- Default – Uses the system default avatar
- Custom – Upload your own image
- None – Hide the agent photo completely
- Agent Photo – Upload or select your custom agent image.
- Recommended: Use a clear, square image
- Best for building trust and personalization
- Agent Name – Enter the name shown in the chat header.
Example: John Doe / Support Team / Your Brand Name - Subtitle – Add a short message under the agent name.
Example: Typically replies within a day - Offline Subtitle – Message shown when you are offline.
Example: Currently offline, will reply soon. - Bubble Header Content Position – Choose alignment of the header content.
- Left (default)
- Center
Box Footer
- Icon for Send Message Button – Select an icon for the chat button.
- Options: Default icons, No icon, Native, or Custom
- Send Message Button Label – Set the button text users will click.
Example: Send a message / Chat now / Start conversation - Footer Content – Enable or disable the footer section.
- Enabled – Shows custom footer text
- Disabled – Hides footer area
- Custom Footer Text – Add content below the chat button.
Example: Chat with us on Messenger!
You can use this for:
- Extra call-to-action
- Instructions
- Branding message
Pro Tip
Use a real agent photo, a clear subtitle, and strong button text to improve user trust and increase chat clicks.